Wishing you all a very Merry Christmas and a Happy New Year!

What’s all the fuss about what’s for Christmas dinner? Turkey? Goose? Ham? Who cares? Let’s get down to the real nitty-gritty – what’s to drink? Because let’s be honest, what you’re drinking may be just the thing that gets you through Christmas dinner when you’re sitting next to Uncle Earl. You know Uncle Earl – the one with the bottle top collection who gets weepy talking about his dog Jess who died back in ’79.

So hats off to Chile Trail fan and food blogger Julia Leonard who – in the Christmas spirit – is sharing her recipe for Chile–Spiked Eggnog. It’s nice ‘n spicy – just the thing to put a smile on your face when Uncle Earl gets going.

Chile-spiked Eggnog

Egg Nog

This is super easy – no separating the eggs. It’s got a nice warm kick but feel free to ratchet up the heat with more chile, because ‘tis the season.

 Makes about 4 cups – enough for Ian or Chuck

 ¾ cup whole milk

¼ cup cream

Nutmeg

1 guajillo chile (or other dried chile of your choice)

4 large eggs

3 Tbsp sugar

1 cup- 1 ¼ cup bourbon or rum

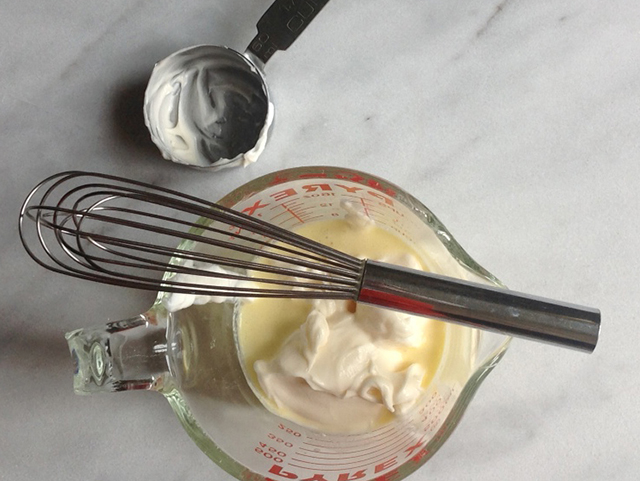
Place the milk and cream in a small saucepan with the chile and a few gratings of nutmeg. Pierce the chile or snip off the tip it allows the chile to infuse the cream better. When the mixture begins to simmer, remove from the heat. Leave the chile to steep in the cream for about five minutes. Strain, making sure to smash the chile bits into the sieve to extract as much chile flavor as possible.

While the cream mixture is steeping, crack the eggs and place them in a medium-sized mixing bowl. Beat with an electric handheld mixer until pale yellow and fluffy. Add the sugar and beat further. Check the cream mixture. You should be able to dip your finger in but barely. If it’s not hot enough, zap it in the microwave for a minute. Turn the mixer back on and while going, slowly drizzle the hot cream mixture into the eggs. Pop in the fridge to cool. When ready to serve, add the booze and ladle into glasses. Top with a light dusting of red chile powder.

ONLY 2 HRS ONLY LEFT to SAVE 25%

JUST over 2 HOURS left ….for our FLASH SALE @loschileros
The Holidays are just around the corner so take advantage of our Flash Sale and take 25% off of our regular prices (shipping excluded) and stock up on your favorite Chiles,Powders,Rubs and Mixes..

Santa wants Posole this year instead of cookies!! ……

2 HRS only ONLY…….Must Finish 8:30MT So don’t delay!

Promo Code: SANTA

http://www.loschileros.com

Santa wants Posole this year instead of Cookies!

FLASH SALE 24HRS ONLY
The Holidays are just around the corner so take advantage of our Flash Sale and take 25% off of our regular prices (shipping excluded) and stock up on your favorite Chiles,Powders,Rubs and Mixes..

Remember Santa wants Posole this year instead of cookies!! ……

TODAY..ONLY…….So don’t delay!

Promo Code: SANTA

http://www.loschileros.com

Summer Lovin’

Corn – specifically corn-on-the-cob – is one of summer’s greatest gifts. Only winning the lottery or finding my keys would make me happier than an ear of corn. I met a farmer who told me he loves the corn he grows so much that he eats it raw.

Okay, so maybe I don’t love it that much.

photo 1

But then he went on to say that he microwaves his corn (when he’s not chowing down on an ear in the fields). Four minutes per ear and the husk and silks slide off effortlessly.

Yeah, sure.

photo 2

So I tried it. And guess what? He’s right. You pop the corn (I’d do a max of two ears at a time) in the microwave as is – don’t peel it or anything. Set the timer for 4 minutes for one ear or 8 for two. Then stand back and watch that puppy twirl around.

Or better yet, make a Chile Butter to go with your corn.

Mix some softened butter (I figure about 1 tablespoon per ear) with some chile powder. I use Chile Molido (press here for the hot version!) but you can go for something hotter if you like. I add about ¼- ½ tsp for 4 tablespoons of butter. By the time you’ve finished mixing it your corn should be ready.

photo 8

Take it out of the microwave and slice off the bottom (stem end). Warning: it’s hot. Very hot. Then carefully pull off the husks and silks – they’ll slide off easily. It’s a piece of cake (or piece of corn), I promise.

photo 4

Slather on some chile butter and you’re good to go. Quick, easy and you’ve got a whole lot of summer lovin’.

Easy Livin’

Summertime – and as the divine Ella sang – the livin’ is easy. How easy? Pretty darn easy. In summer, Mother Nature – bless her heart – does all the hard work for you. It’s not like the dead of winter when you’re facing another cabbage, is it?

MELON MEDLEY

Take our friend the cantaloupe. Was there ever anything better? Perfectly ripe and dripping with sweet goodness (I blush!). You don’t really need to do much/anything with it, do you? It helps if you slice it, but after that you’re on easy street. I love the classic combination of melon and prosciutto – thin, wafer slices of prosciutto draped over a hefty wedge of melon.

Of course, never content to leave something totally unadorned, I drizzle a bit of chile oil on top.

Chile Oil

1 ½ cups vegetable oil
½ cup Los Chileros Chile Pequin, Crushed

To make the chile oil, heat the oil in a saucepan until it is hot but not simmering. While the oil is warming, place the chile flakes in a clean glass jar (an old jam jar will do). When the oil is hot, remove it from the heat and pour into the jar with the chile flakes. The flakes will sizzle slightly. If the oil is too hot, pour in some room temperature oil to reduce the temperature.

spicy-chicken-3

If possible, make the chile oil the day before (or even earlier). This allows the oil to cool down and for it to take on more of the chile flavor. The oil will keep very happily in your refrigerator indefinitely as long as the chile flakes are completely covered in oil.

Purists may raise their hands in horror but too bad. It’s my melon and I’ll eat it any way I want. Plus, you’ve got to trust me on this – it tastes pretty darn good. You’ve got the sweetness of the melon, the salt of the prosciutto and the zing-a-ling-ling of the chile oil.

Life may get better than this but I doubt it.

Summer Sizzles

Summer is a good thing. A summer barbecue is a great thing. But (you knew there was going to be one, didn’t you?) that doesn’t mean you can throw an old pair of boots on the grill and it’s going to taste good. Nice weather and lots of beer and wine will only get you so far.

Illustration from Better Homes & Gardens "Barbecue Book," 1956, with spicy addition

Illustration from Better Homes & Gardens “Barbecue Book,” 1956, with spicy addition

Spice – that’s what the average BBQ is missing. Too many people slap a burger in a bun and call it a day. Take a bit of time, make a simple spice rub and you suddenly look like a culinary genius. It’s not hard – for heaven’s sake we’ve even given you a recipe. And if you don’t like a certain spice then skip it, change it around so it’s your own. To make it even easier, use one of our spice rubs and marinades. Lie. Tell your friends you made it yourself – we don’t care.

A word about chicken…We know folks love their chicken breasts but give a thigh a try. It’s dark meat so it stays juicier and it’s cheaper too. We promise one bite and you’ll love us more than you already do (which is a heck of a lot, isn’t it?).

And don’t forget to use sunscreen – on you, not the chicken.

Spicy Chicken Thighs

Serves 5 to 6

This marinade makes plenty for 3 pounds of chicken thighs – that’s about 12 or 13 thighs. Figure 2 to 3 thighs person.

Spice mixture:
½ tsp fennel seed
½ tsp cumin seed
¼ tsp coriander seed
¾ tsp pimenton
1 tsp Los Chileros ancho powder
1 tsp sea salt
1 clove garlic, peeled and chopped in half

1 cup Greek/plain yogurt
A healthy glug of olive oil
3 lbs chicken thighs, boneless and skinless

Cilantro, chopped for garnish (optional)
Lime or lemon wedges (optional)

With a mortar and pestle, crush together the ingredients for the spice mixture. You’re aiming for a rough paste. If you don’t have a mortar and pestle (shame on you!) you could grind the spices in a coffee grinder, finely chop the garlic separately then mix the two together in a bowl.

photo 1photo 2Place the spice mixture in a large bowl, add the yogurt and a healthy glug of olive oil. Taste the mixture and adjust the intensity with more chile if you desire and additional salt if needed. Add the chicken thighs and toss to coat. Cover the bowl and place in the fridge to marinade. A couple of hours if okay but longer is better.

photo 3

Remove the thighs from the marinade, wiping off any excess. Place on a hot barbecue and cook on both sides until done (this will depend on the heat of your BBQ and the size of the thighs but figure around 10+ minutes).

photo 5

Remove and place on a serving platter. Garnish with chopped cilantro, a drizzle of olive oil and lime or lemon wedges if you desire. Serve hot or at room temperature.

Fiery Finger Food

There’s finger food and there’s finger food. While you scratch your head, I’ll explain. Basically anything you eat with your hands – potato chips, sandwiches, an apple all the way up to those fussy canapés they serve at foo-foo-shee-shee cocktail parties is finger food, right? Yes, but I’m thinking of something a bit different.

photo 1

When I think of finger food – real finger food – I think of food you could eat with a fork and knife but don’t. We’re talking food that invites you to get messy. Take asparagus for example. Now you could be all hoity-toity and cut it with a fork and knife, but why bother? Isn’t it a whole lot more fun to pick that spear up, dunk it in a whole heap of hollandaise and chow down? Sure you’re going to get some on your shirt. Heck yea, someone is going to think you’re a barbarian. But do you care?

Now the key to my kind of finger food is eating it with like minded people. It’s a whole lot more fun if everyone is taking their clothes off when it’s time for skinny-dipping, isn’t it? You want people who aren’t afraid to walk – no, run – on the wild side. And it helps if they’re greedy. So choose your guest list carefully or if no one comes to mind then eat by yourself. Remember, you’re great company – honestly.

Here’s a recipe to get started. Fiery shrimp in the shell with Gazpacho Salsa. This recipe feeds two hungry people but you could double or triple it with no problems. Bring the shrimp fresh from the BBQ. Plop down a bowl of the salsa and dig in. Some tortillas and guacamole wouldn’t go amiss either. And if someone is looking particularly anxious about ripping off a bunch of shrimp shells then help them out – finger food aficionados weren’t made in a day.

Fiery Shrimp with a Gazpacho Salsa

SHRIMP COLLAGEServes 2.

This is easy-peasy. Enough said.

1 clove garlic, peeled
1 Chile Negro, rehydrated in boiling water for about 5 minutes until pliable
1 lb shrimp, shell-on
¼- ½ red onion, roughly chopped
½ red romano pepper (or bell pepper), roughly chopped
3-4 large plum tomatoes, stem end removed and roughly chopped
3-4 Tbsp breadcrumbs
2-3 Tbsp red wine vinegar
¼ cup olive oil – half for the marinade and
half for the salsa
Salt

Remove the stem from the chile pepper. Place the chile and the garlic in the small bowl of a food processor. Don’t worry about removing the chile seeds – they’re mighty tasty. Pulse until a rough paste is formed. Add a bit of salt and mix again. Remove half the chile/garlic mixture and place it in a bowl with 1/8 cup olive oil. Mix and add the shrimp. Toss to coat. Set aside in the refrigerator to marinade – an hour or so is plenty of time.

Meanwhile, make the salsa. To the small bowl that has the remaining half of the chile/garlic mixture, add the roughly chopped tomatoes, onion, and pepper. Blitz until a thick puree is formed. Add the remaining 1/8 cup olive oil, vinegar and bread crumbs and pulse to mix. Taste and add salt as needed. Place in a serving bowl.

Fire up the BBQ. Remove the shrimp from the marinade and place on the hot BBQ. Cook for a minute or two until they begin to turn pink then turn and cook for another minute or so. Remove and place in a large serving platter or bowl and serve with the salsa. Lots of napkins and you’re good to go.

Gourd-zilla

Do you know the world record for biggest squash ever grown? No? We didn’t either. Thank heavens for this new fangled thing called the ‘internet’. If you haven’t checked it out yet, please do. Anyway, turns out that the award goes to one Joel Jarvis from Ontario (read about lovely Joel here). His squash weighed in at almost 1,500 pounds which one news report equated to the size of a polar bear. Gosh, who knew?

SQUASHES

Joel says it was all down to lots of fertilizer and TLC. The prize-winning specimen – so we understand – gained up to 40 lbs per day. Which of course makes you wonder how they figured that one out. Did they drag the bathroom scales out to the veg patch every day?

But I digress. Why you ask, this obsession with squash? Because dear reader, the season is upon us. Plant a squash plant – just one – and you’ll be inundated for what seems a lifetime. They grow exponentially (okay, maybe not like Joel’s but you get the idea) and if you turn your back on them, they go from cute wee things to the squash that ate Manhattan.

So as summer draws ever nearer, you’ll see people frantically searching their files for squash recipes. Remember Aunt Flo (she was the one with the rather heavy beard) and her zucchini bread? Get the ovens cranked up for that puppy. And how about that squash puree bake with cracker crumbs (on second thought, nix that one)? Or just let your fingers do the walking and go to that marvelous new thing, the ‘web’. We came up with – and we’re not kidding here – over 30 million hits in .22 seconds. Don’t you love technology?

But to get you started, here’s an old favorite. Actually, it’s not that old. We just dreamed it up about 15 minutes ago. It’s quick, easy and you’ll be thanking us for the next 3-4 months. And if you are growing squash, consider setting up a sentry schedule with family members and loved ones to keep an eye out on your crop. You may not get close to Joel’s record but you’d be surprised what squash get up to when you’re not looking.

Summer Squash with Spicy Tomato Sauce

Serves 3-4 as a side dish

1 lb yellow squash (about 2 medium)
1 cup plain tomato sauce
1 tsp Chile Pequin (or more to taste)
1 Tbsp olive oil + additional for the squash
1 garlic clove finally chopped
Salt
Chopped herbs to garnish (basil, cilantro or parsley are good choices) – optional
New Mexico Chile Caribe Green to garnish

Preheat oven to 425˚ F

Cut off the stem and tail ends of the squash and slice the rest into thin rounds. Brush two baking sheets with olive oil then place the squash slices on the pans and brush the slices with some of olive oil. Sprinkle with a bit of sea salt and place in the pre-heated oven.

SQUASH COLLAGE

Roast until cooked through but not mushy – it shouldn’t take more than about 10 minutes. While the squash is roasting, make the spicy tomato sauce. Place the chile, olive oil and garlic in a saucepan and cook gently until the oil starts to sizzle and the garlic cooks slightly (watch it like a hawk because garlic loves to burn and burned garlic is a no-no). Add the tomato sauce and cook for a few minutes. Taste and add salt if needed.

FINISHED SQUASH

To serve, arrange the squash around a platter. Drizzle some of the tomato sauce over the top and place the rest in a serving bowl so folks can add more if they desire. Garnish with the herbs (if using) and Green Chile Caribe and serve. This is also mighty tasty with the additional of a bit of goat’s cheese or cubes of feta on top.

Back on the Ranch

I know someone who knew someone (you can see where this is going) who used to sit in bed reading books and eating wedges of iceberg lettuce slathered in salad dressing. I know what you’re thinking – which salad dressing? Was it perchance Russian? Or Thousand Island? Because you just know that someone who eats iceberg lettuce in bed isn’t going to go for balsamic and olive oil, are they?

RANCH PIC

The answer is – unfortunately – I don’t know. But I like to think it was Ranch dressing. Let’s face it, if you’re going to blow the caloric bank, you might as well go for Ranch. Ranch dressing flew on the scene in the 70’s – remember those Hidden Valley Ranch® packets you’d mix up with buttermilk and mayo? They still exist but now you’re more likely to buy it by the bottle.

According to Coleman Andrew’s The Taste of America (OK, I’m name dropping here), ranch dressing started at the Hidden Valley Ranch, in the hills near Santa Barbara. How much do I love there really was/is a Hidden Valley Ranch? I bet it was full of lots of teeny-tiny cowboys all mixing up vats of salad dressing. I mean, how cute would that be?

Anyway, they sold in ’72 to Clorox (yum) but you can still buy Hidden Valley Ranch dressing today and according to their website it’s good on everything. Everything? But if you’re feeling perky, why not make your own Ranch dressing? It’s incredibly easy so it’s good for you lazy so-and-so’s who can’t be bothered to actually cook.

RANCH 3

And it’s good. Mighty good. And of course once you add in some green chile powder it goes from good to great. If I say so myself. So wheel out the iceberg lettuce (another nutritional dynamo – not), a good book and sit back in bed. It’s party time.

Green Chile Ranch Dressing

Makes a bit more than a cup but feel free to double it if you want more (and who doesn’t?).

¼ cup sour cream or plain Greek yogurt
¼ cup buttermilk
½ cup mayonnaise (regular or light)
Juice of ½ lemon
1 ½ Tbsp chopped parsley
½ a clove of garlic, finely minced or a sprinkle of garlic powder
1 ½ – 2 tsp green chile powder
Salt & pepper to taste

RANCH 1RANCH 2RANCH 4

Mix all the ingredients together in a mixing bowl and if possible, refrigerator for a day to let the flavors marry. But if you’re like me, you’ll eat the whole thing before it even has a chance to see the inside or a refrigerator.